Need an Appointment?
If you'd like to book an appointment with the dentist at Seymour Dental then contact us, or call us in Dulwich Hill, Sydney on (02) 9564 2397.
Dental implants come in a variety of systems that use various ways of placing and making the implant integrate into the bone. The process of integration occurs when the bone grows onto the surface of the implants and the bone cells adhere to its surface. The most important factor for the implant to integrate into the bone is stability. If the implant moves too much during the process of integration then other cells will take over making fibrous tissue causing the implant to fail.
Most systems use threads to screw into the bone after preparation to initially stop the implant moving. Then it’s a matter of ensuring the implant is not moved by the person over the next few months. The average accepted time is six months. It’s usually longer in the less dense upper jaw then the more compact bone of the lower jaw. The position of the implant and the type of implant depends what the implant is going to be used for. The main categories are to replace teeth or to hold a denture. This blog will focus on the common usage of replacing one tooth.
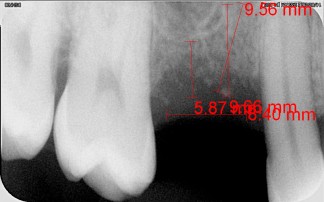
The steps below assume that there is enough bone to support the implant. The position of the implant is largely dictated by the position of the surrounding teeth and the most desirable position to place the replacement tooth. The important factors to consider are its appearance and how it will function in the bite.
Usually local anesthetic is all that is required. However sedation can be used if needed.
Access to the bone
Two broad approaches can be done.
- The gum is peeled back in certain surgical shapes. This is called a flap. This exposes the bone and allows the dentist to see the bone before preparing the site for the implant. This will require the “flap” to be sutured back (stitched) to cover the bone after the placement of the implant. This approach allows the option of covering the implant totally. This means another surgical procedure later to uncover the implant and prepare the gum for an implant crown. Another option is to screw a cylinder long enough on the implant to allow the gum to grow around the implant to form a gum “cuff” similar to teeth. This then reduces the need for a second surgery. Sometimes a temporary tooth can be incorporated into this cylinder. This cylinder is called a healing abutment.
- A tissue punch cutter can be used to cut a hole in the gum to access the bone. This approach requires no sutures and is less traumatic to the gum. However this approach requires certainty of the amount of bone present. You also cannot totally cover the implant and a healing abutment must be used.
Pilot Drill
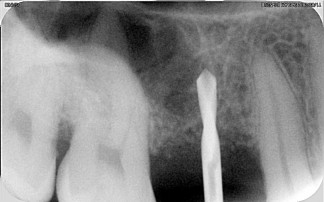
This drill is used to cut at the desired position and to the desired depth. This is determined by the bone space available and the size, shape and type of tooth needed. This then determines the type of implant. The main measurements are its length, shape, and diameter. Shape of the implant are tapered (like a long rounded triangular shape, similar to a shape of a tooth root) or parallel sided (like a tube).
Another consideration is whether the final tooth will be screw retained or cemented on. This is especially important in front teeth. Screw retained means there is access to the screw that holds the final crown can be accessed through a hole in the crown. This allows the crown to be removed for repair and negates the need for a foundation or core to be attached to the implant. No cement is required. The screw head is covered with a soft material that can be easily removed. Then the access hole is filled with a tooth coloured filling. So for screw retained crowns on the front teeth, the access hole is at the back of the tooth and therefore not seen. This means the implant needs to be placed towards the palate in the upper jaw and near to the tongue in the lower jaw for the front teeth.
Cement retained crowns need a foundation screwed onto the implant upon which a crown is cemented on. The placement of the implant tends to be in the middle of the space.
The pilot drill is then used to drill to the depth required. The usually depths used for implants are 8mm,10mm,13mm,16mm. However some implant systems have other lengths.
Next week: Focus on implants – The surgery – Part 2 – Placing the implant
 479 Marrickville Road
